Embarking on the journey to solar power is an exciting prospect for homeowners, promising energy independence, significant savings, and a smaller carbon footprint. But before you bask in the glow of clean energy, it's crucial to understand The Solar Installation Process & Home Readiness. This isn't just about panels on a roof; it's a multi-stage transformation of your home's energy ecosystem.
Think of it like building a custom addition to your home. You wouldn't start framing without a blueprint, permits, and a trusted contractor. Solar is similar: a well-understood process ensures a smooth transition, optimal performance, and lasting peace of mind.
At a Glance: Your Solar Journey in Brief
- Total Timeline: Expect the entire process, from initial consultation to flicking the switch, to span approximately 60-120 days.
- Longest Phase: Permitting and approvals often take the longest, typically 30-45 days, varying by local jurisdiction.
- Physical Installation: The actual mounting of panels and wiring usually wraps up in a swift 1-3 days.
- Longevity: Modern solar systems come with 25-30 year performance warranties, requiring minimal maintenance.
- Professionalism is Key: Expert installers are non-negotiable for safety, legal compliance, peak performance, and preserving equipment warranties.
- Financial Upside: Significant federal, state, and local incentives can offset average costs ranging from $15,000-$30,000 before rebates.
Why Understanding Your Solar Journey Matters
Switching to solar isn't a simple off-the-shelf purchase; it's an investment in your home and future. Demystifying the installation process empowers you to ask the right questions, make informed decisions, and partner effectively with your chosen installer. Knowing what to expect, from assessing your roof's readiness to understanding local permitting nuances, sets you up for a successful and stress-free transition to clean energy.
The Financial Foundation: Costs & Incentives for 2025
Before any physical work begins, understanding the financial landscape is paramount. The initial investment in a home solar system typically ranges from $15,000 to $30,000 before any incentives are applied. Thankfully, a robust framework of financial support makes solar more accessible than ever.
Decoding the Savings: Key Incentives & Programs
- Federal Investment Tax Credit (ITC): This is the bedrock of solar incentives. Through 2032, homeowners can claim a 30% tax credit on the cost of their solar system. It's crucial to note that proposed 2025 legislation could alter or eliminate this credit, making early adoption or careful planning even more beneficial. This credit directly reduces your federal tax liability, dollar for dollar.
- State and Local Rebates & Tax Credits: Beyond federal incentives, many states, counties, and even cities offer their own programs. These can include direct cash rebates, additional state tax credits, or grant programs.
- Net Metering: A game-changer for solar economics, net metering allows you to send excess electricity generated by your panels back to the grid. In return, your utility provides credits on your bill, effectively "spinning your meter backward" and drastically reducing or even eliminating your electricity costs.
- Solar Renewable Energy Certificates (SRECs): In some markets, your solar system generates SRECs for every megawatt-hour (MWh) of electricity it produces. These certificates can then be sold on a market, providing an additional income stream.
- Property Tax Exemptions: Many jurisdictions offer property tax exemptions for the added value solar panels bring to your home. This means you won't pay higher property taxes just because you've installed solar.
Financing Your Solar Future
Several pathways exist to fund your solar project, catering to different financial situations:
- Cash Purchase: The most straightforward option, a cash purchase yields the highest long-term savings by eliminating interest payments and allowing you to fully benefit from all available incentives immediately.
- Solar Loans: These are specialized loans, often unsecured, designed for solar installations. They allow you to own the system without a large upfront cost, and the monthly loan payments are often offset by your reduced electricity bills.
- Solar Leases: Under a solar lease, you pay a fixed monthly "rent" for the solar system, and the installer (or a third party) owns the equipment. You benefit from lower electricity bills without the responsibility of ownership or maintenance.
- Power Purchase Agreements (PPAs): Similar to a lease, a PPA involves a third party owning and maintaining the system on your roof. Instead of a fixed monthly payment, you purchase the electricity generated by the panels at a fixed, often lower, rate per kilowatt-hour. This offers predictable energy costs.
- PACE (Property Assessed Clean Energy) Financing: Available in select areas, PACE programs allow you to finance energy-efficient home improvements through an assessment added to your property tax bill. It's repaid over a long term, often 10-20 years, and is tied to the property, not the homeowner.
Given the complexities of incentives and financing, it's wise to assess whether solar power is a worthwhile investment for you by carefully comparing these options and crunching the numbers. A reputable installer will help you navigate this financial landscape.
Phase 1: Your Solar Blueprint – Pre-Installation Planning & Preparation (Typically 30-45 Days)
Before any hardware touches your roof, a thorough planning phase ensures your solar system is perfectly tailored to your home and energy needs. This typically takes 30-45 days and is where your installer truly acts as your expert guide.
Crafting Your Custom System: Home Evaluation & Design
This initial assessment is critical. Your chosen solar provider will meticulously analyze several factors to design a system that maximizes energy production and aligns with your consumption patterns.
- Energy Consumption Analysis: Prepare at least 12 months of your electricity bills. This data provides a crucial snapshot of your annual kWh usage, seasonal peaks, and overall demand. It's the foundation for determining the optimal system size to offset your current consumption.
- Roof Assessment: Your roof is the primary canvas for your solar array. Engineers will evaluate:
- Age and Condition: A roof nearing the end of its lifespan should ideally be replaced before solar installation to avoid additional costs down the line.
- Structural Integrity: Can your roof safely support the weight of the panels and mounting hardware, especially under potential snow loads or high winds?
- Orientation and Slope: South-facing roofs (in the Northern Hemisphere) with an optimal pitch typically receive the most sunlight, but modern systems can perform well on east or west-facing roofs too.
- Available Space: Ensuring there's adequate, unobstructed space for the number of panels needed.
- Shading Analysis: Nearby trees, chimneys, dormers, or even neighboring buildings can cast shadows, significantly impacting panel efficiency. Sophisticated software models sunlight paths throughout the year to identify and mitigate shading issues.
- Electrical Panel Capacity: Your home's existing electrical panel must be able to handle the new solar input. An assessment will determine if an upgrade (e.g., a "main panel upgrade" or "MGU") is necessary to safely integrate the solar electricity.
Based on this comprehensive evaluation, solar engineers design a customized system. This includes selecting the most appropriate panel types (e.g., monocrystalline for higher efficiency in smaller spaces), inverters (string, power optimizers, or microinverters, each with pros and cons regarding efficiency and monitoring), mounting systems specific to your roof type, and the precise electrical layouts. They'll also consider any potential for future expansion, should your energy needs grow.
Choosing Your Partner & Paving the Way: Financials & Installer Selection
With a preliminary design in hand, you'll delve deeper into the financial aspects and, crucially, select your installation partner.
- Finalizing Financials: Revisit the available incentives and financing options. Your installer should provide a clear breakdown of costs, potential savings, and how incentives will apply to your specific project.
- Installer Vetting: This is one of the most critical decisions. Seek out multiple certified installers with a strong local track record. Look for:
- Certifications: Are they NABCEP (North American Board of Certified Energy Practitioners) certified? Do they hold relevant state electrical licenses and manufacturer certifications?
- Experience: How long have they been operating in your area? Can they provide local references?
- Safety Training: Do their crews undergo OSHA (Occupational Safety and Health Administration) training?
- Reviews and Reputation: Check online reviews and independent rating services.
- Warranties and Service: Understand their comprehensive warranty coverage for equipment and workmanship, and their post-installation service commitment.
- Contract Review: Once you've chosen an installer, carefully review the contract, ensuring all agreed-upon details, pricing, timelines, warranties, and responsibilities are clearly documented. Don't hesitate to ask questions before signing.
The Deep Dive: Engineering Site Assessment
After contract signing, a detailed engineering site assessment confirms all previous findings and prepares for the physical work. This in-person visit is more in-depth than the initial virtual evaluation.
- Structural Load Capacity: A structural engineer may verify your roof's load-bearing capacity to ensure it can support the solar array, especially crucial for older homes.
- Precise Measurements: Highly accurate measurements of your roof and property are taken to finalize panel placement and wiring runs.
- Electrical System Compatibility: A certified electrician will meticulously review your entire electrical system, confirming compatibility and identifying any necessary upgrades to your service panel or wiring.
- Advanced Shading Analysis: Using specialized tools, a more precise shading analysis is conducted, accounting for even minor obstructions.
- Access Routes: Planning how equipment and personnel will safely access your roof and property.
This step is vital for identifying any potential hidden issues, such as the need for an electrical panel replacement, roof repairs, or tree trimming, which must be completed before the installation crew arrives.
Phase 2: From Design to Power – The 7 Steps of Installation & Activation
Once the planning is complete and all prerequisites are met, the journey transitions to the hands-on phase. While the entire process takes months, the physical installation itself is remarkably quick.
Step 1: Navigating the Red Tape – Permitting and Approvals (The Longest Leg)
This phase, often the most extended at 30-45 days, is entirely handled by your professional installer, who acts as your advocate through bureaucratic hurdles.
- Local Authority Having Jurisdiction (AHJ) Permits: This includes securing general building permits and specific electrical permits from your city or county.
- Homeowners Association (HOA) Approvals: If you live in an HOA, architectural review and approval are often required.
- Utility Interconnection Applications: You'll need permission from your local utility company to connect your system to their grid and engage in net metering.
- Fire Department Setback Compliance: Regulations often dictate specific setbacks from roof edges, ridges, and skylights for firefighter access.
- Historic District Approvals: Homes in historic districts may have additional aesthetic and design restrictions.
Permit processing times vary significantly by location, which is why an experienced local installer is invaluable for navigating these specific requirements efficiently.
Step 2: Gathering Your Gear – Equipment Procurement and Delivery
Once all necessary permits are approved, your installer orders and takes delivery of all system components. This ensures everything is on-site and ready for installation.
- Solar Panels: These come with robust warranties—typically 25-30 years for performance (guaranteeing a certain output over time) and 10-25 years for the product itself (covering defects).
- Inverters: The brain of your system, converting DC electricity from panels to AC for your home. String inverters often have 10-12 year warranties, while microinverters (which optimize each panel individually) typically boast 20-25 year warranties.
- Mounting Hardware: Racking systems designed for your specific roof type (shingle, tile, metal) to securely hold the panels.
- Electrical Components: Wiring, conduits, disconnects, and safety devices.
- Monitoring Systems: Hardware and software that allow you to track your system's performance.
- Safety Equipment: Essential for the installation crew.
A crucial quality control step is performed upon delivery to ensure all equipment is correct, undamaged, and meets specifications.
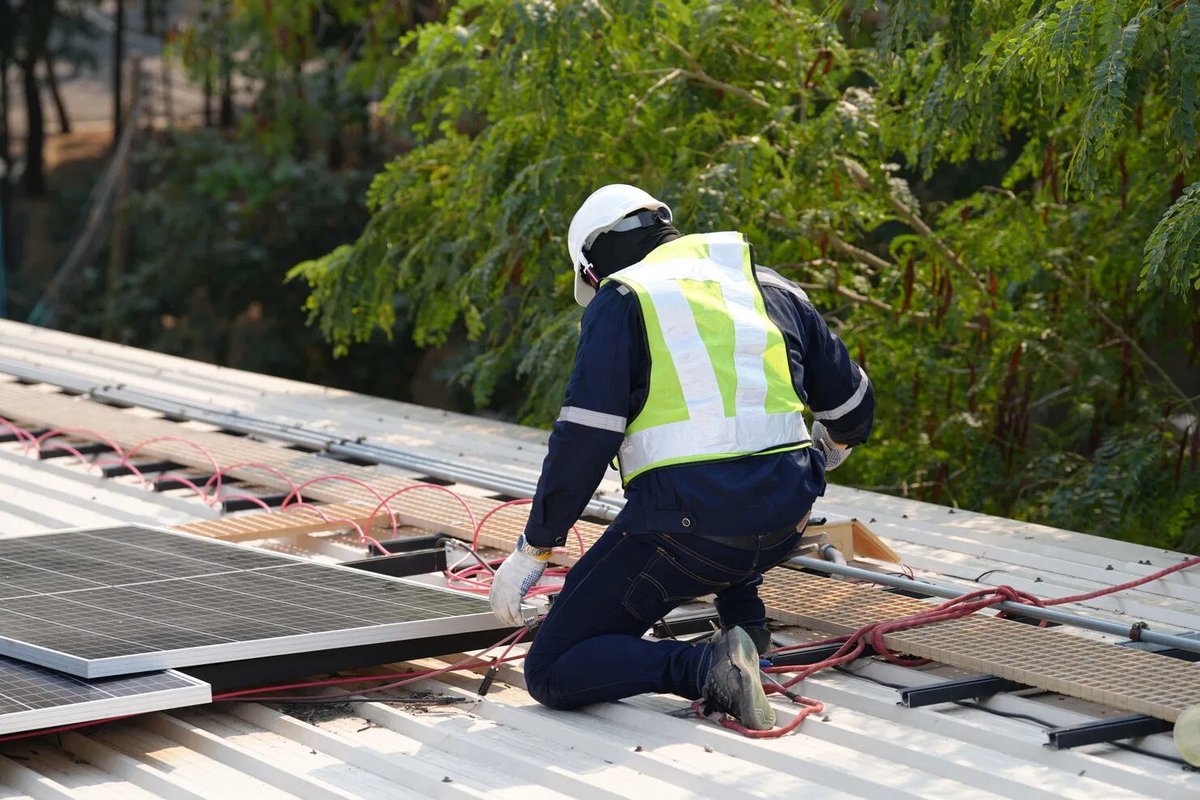
Step 3: Bringing it to Life – Physical Installation (1-3 Days)
This is the most visible and often fastest part of the process. A skilled crew will typically complete the physical installation for most residential systems within 1-3 days.
- Roof Preparation: This involves ensuring the roof surface is clean and ready for mounting.
- Mounting System Installation: Racking is securely attached to your roof's rafters, often with flashing to ensure watertight seals.
- Solar Panel Placement: Panels are carefully lifted, positioned, and secured onto the racking system.
- DC and AC Wiring: Electrical connections are made from the panels (DC wiring) to the inverter, and then from the inverter to your home's main electrical panel (AC wiring).
- Inverter Installation: The inverter(s) are mounted in an accessible location, often on an exterior wall or in a garage.
- System Grounding: Proper grounding is established for safety and code compliance.
- Monitoring System Setup: The hardware for your performance monitoring is installed and connected.
Throughout this stage, strict safety protocols, including OSHA-compliant fall protection and electrical safety measures, are rigorously followed to protect the crew and your property.
Step 4: Checking the Circuits – System Testing
Once all physical components are in place, a series of comprehensive tests ensures the system is operating safely and efficiently.
- Electrical Continuity Checks: Verifying all connections are sound and free of breaks.
- Ground and Arc Fault Protection: Testing safety features designed to prevent electrical fires.
- Inverter Functionality: Ensuring the inverter is properly converting DC to AC power.
- Monitoring System Calibration: Confirming the monitoring system accurately tracks production.
- Performance Testing: If conditions allow, preliminary performance testing under sunlight will show initial power output.
Step 5: The Seal of Approval – Final Inspections
Before your system can be officially turned on, multiple inspections are required by various authorities to ensure everything meets local codes and safety regulations.
- Local Building Department: Verifies structural integrity and overall construction.
- Electrical Authorities: Ensures all wiring and electrical components comply with national and local electrical codes.
- Fire Department: Confirms adherence to fire safety regulations, including setbacks and access.
- Utility Company: Conducts their own inspection to ensure safe interconnection with the grid.
Any identified issues during these inspections must be corrected by your installer before the process can move forward.
Step 6: Power On! – Utility Interconnection and System Activation
This is the exciting moment you've been waiting for! The final step involves formalizing the connection to the grid and activating your system.
- Permission to Operate (PTO): Once all inspections pass, the utility company grants Permission to Operate (PTO), which is your green light to officially turn on your system.
- Net Metering Agreement Activation: Your net metering agreement with the utility becomes active, allowing you to seamlessly send excess energy back to the grid for credits.
- Bi-directional Meter Installation/Programming: A special meter is installed or programmed by the utility to track both the electricity you consume from the grid and the excess electricity your system sends back.
- System Commissioning: Your installer will "commission" the system, ensuring all components are synchronized and functioning optimally.
- Performance Monitoring Activation: Your real-time monitoring system is fully activated, allowing you to track your energy production.
- Customer Training: Your installer will walk you through your new system, explain how to read your monitoring app, understand your utility bills, and answer any questions about basic operation.
Immediately upon receiving PTO and commissioning, your system begins generating electricity, and you can start enjoying the benefits of solar power!
Step 7: Keeping the Lights On – Post-Installation Monitoring & Maintenance
Your solar journey doesn't end after activation. Modern solar systems are designed for minimal maintenance, but continuous monitoring and occasional checks ensure optimal performance for decades.
- Real-time Monitoring Apps: Most systems come with user-friendly apps or online portals that provide real-time data on your energy production, individual panel performance, and overall system health. This allows you to quickly identify any anomalies.
- Recommended Maintenance:
- Quarterly Visual Inspections: A quick look from the ground for any obvious debris, shading issues, or damage.
- Monthly Monitoring Review: Check your app monthly to ensure production is consistent with expectations.
- Annual Professional Inspections: Many installers offer annual check-ups to confirm electrical connections, clean panels if necessary, and assess system performance.
- Panel Cleaning: While rain often keeps panels clean, heavy dust, pollen, or bird droppings can reduce efficiency. Cleaning is generally only needed if a significant drop in production is observed, and can often be done with a hose or by a professional.
- Warranties that Protect You:
- Inverter Warranties: As noted, these range from 10-12 years for string inverters to 20-25 years for microinverters.
- Installation Workmanship Warranties: Your installer typically provides a warranty covering their labor and the quality of the installation, usually ranging from 2-10 years.
Navigating the Bumps: Common Challenges on Your Solar Journey
While the solar installation process is well-structured, a few common challenges can arise. Being aware of them helps manage expectations.
- Permit Delays: As highlighted, this is the most frequent cause of extended timelines. Local government backlogs or specific requirements can add weeks to the process. An experienced installer with strong local relationships is best equipped to mitigate these.
- Weather Conditions: Inclement weather, such as heavy rain, snow, or high winds, can temporarily halt physical installation, pushing back schedules.
- Utility Interconnection Nuances: Each utility company has its own set of rules and timelines for interconnection and PTO. These processes can sometimes be slower or more complex in certain regions.
- Supply Chain Issues: While generally improving, global supply chain disruptions can occasionally affect the availability or delivery of specific solar panels, inverters, or other components.
Your Home's Readiness Checklist for Solar Success
To ensure your solar journey is as smooth as possible, here's a quick checklist of how you can prepare your home:
- Gather Your Energy Bills: Have 12 months of electricity bills readily available for accurate sizing.
- Inspect Your Roof: If your roof is older than 10-15 years, consider replacement or repairs before installation.
- Address Shading Concerns: Trim trees or remove obstructions that might cast shadows on your roof.
- Assess Electrical Panel: Be prepared for a potential electrical panel upgrade if recommended by your installer.
- Research HOAs: Understand any architectural review processes if you live in a Homeowners Association.
- Clear Access: Ensure clear access around your property for crew and equipment on installation day.
- Stay Engaged: Be available to answer questions and provide necessary documents to your installer.
Your Next Steps to a Brighter Future
The journey to solar power is a significant yet rewarding one. By understanding "The Solar Installation Process & Home Readiness" in detail, you're not just preparing for an installation; you're preparing for a future of energy independence and environmental responsibility.
Ready to take the first step? Start by gathering your electricity bills and reaching out to a few reputable, NABCEP-certified solar installers in your area. Request detailed quotes, compare designs, and ask plenty of questions. With the right information and a trusted partner, you'll soon be harnessing the power of the sun and enjoying the many benefits that come with it.